Key Takeaways
- A clicker creates a precise marker signal that bridges the gap between the desired behaviour and the treat reward, improving learning speed by up to 40%
- “Charging the clicker” takes only 10 to 15 repetitions in a single session before your dog understands the click means a reward is coming
- Keep initial training sessions to 3 to 5 minutes so your dog stays engaged and ends each round on a positive note
- Clicker training works for dogs of all ages and breeds, from eight-week-old puppies to senior rescues learning new skills
- The three core principles are timing, consistency and a high rate of reinforcement, which together build reliable behaviours without force or intimidation
- Most owners can teach a solid “sit” and “touch” cue within the first two clicker sessions using the exercises outlined below
In This Guide
- What Is Clicker Training and Why Does It Work?
- The Science Behind the Click
- Equipment You Need to Get Started
- Charging the Clicker: Your Very First Step
- First Exercises: Sit, Touch and Name Recognition
- Common Mistakes and How to Avoid Them
- Clicker Training vs Other Marker Methods
- Advancing Your Clicker Skills: Shaping and Chaining
- When and How to Fade the Clicker
What Is Clicker Training and Why Does It Work?
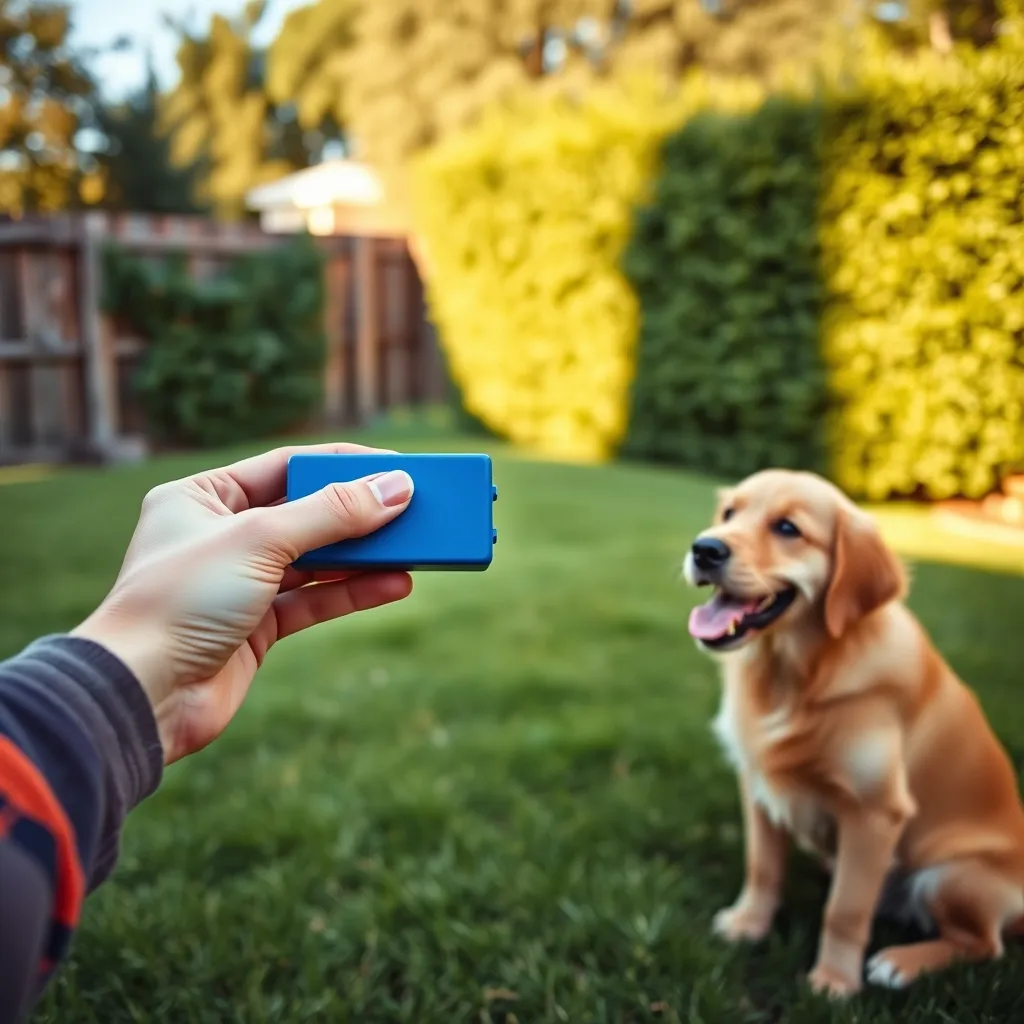
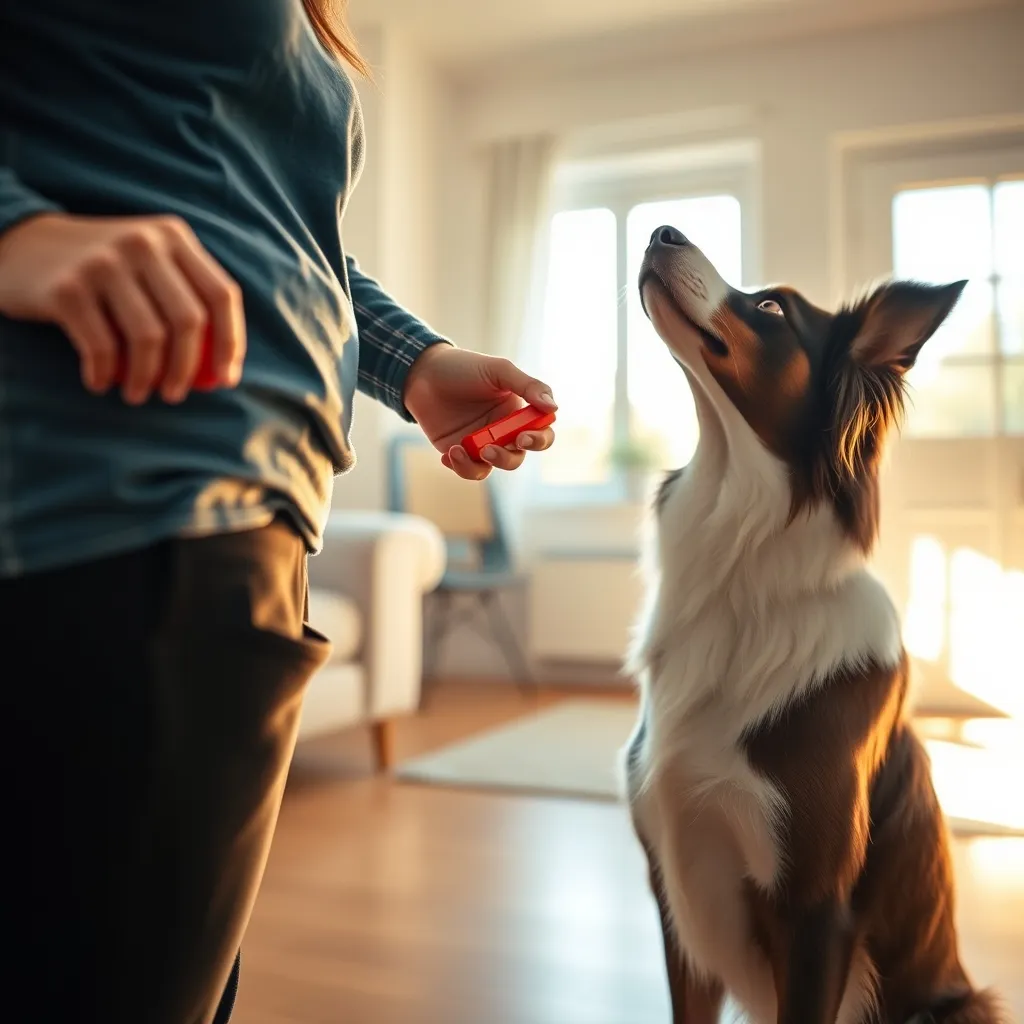
Clicker training is a force-free, reward-based method that uses a small handheld device producing a short, distinct “click” sound to mark the exact moment your dog performs a desired behaviour. The click is always followed by a reward, usually a small treat, which teaches your dog that the sound predicts something wonderful. Over time, your dog actively offers behaviours to earn that click.
I have used clicker training with hundreds of dogs over the past decade, from anxious shelter dogs who flinched at sudden movements to confident puppies bouncing off the walls. The reason I rely on it so heavily is simple: it gives me a way to communicate with pinpoint accuracy. Instead of vaguely praising “good dog” a second or two after the behaviour, the click lands at the precise instant the dog does what I want. That precision accelerates learning dramatically.
The method was popularised by marine-mammal trainer Karen Pryor in the 1990s, drawing on decades of operant-conditioning research. Today it is endorsed by veterinary behaviourists, professional trainers and welfare organisations worldwide. If you are new to dog ownership, I often recommend pairing clicker work with the broader advice in our guide on best dog breeds for first-time owners, because understanding your dog’s natural temperament helps you set realistic training goals from the start.
The Science Behind the Click
Clicker training is rooted in operant conditioning, specifically positive reinforcement. When a behaviour is followed by something the dog values, the dog is more likely to repeat that behaviour. The clicker functions as a conditioned reinforcer (sometimes called a “secondary reinforcer” or “bridge signal”). It tells the dog: “Yes, that exact thing you just did is what earned the treat.”
Why not just use your voice? You absolutely can, and I discuss verbal markers later in this article. However, a mechanical click has two advantages. First, it sounds identical every time, which removes the emotional variation that naturally creeps into our voices. Second, research published in the journal Applied Animal Behaviour Science suggests that the sharp, novel sound of a clicker can be processed faster by the dog’s brain than a familiar human word, leading to quicker association between behaviour and reward.
Understanding your dog’s body language during sessions is equally important. A dog who is yawning, turning away or licking their lips may be stressed rather than inattentive. Our article on reading tails, ears, eyes and posture can help you recognise these signals so you know when to take a break.
Equipment You Need to Get Started
One of the best things about clicker training is how little gear you need. Here is a quick checklist:
- A clicker. Box clickers (the classic rectangular type) produce a loud, crisp sound. Button clickers are softer and better for sound-sensitive dogs. I keep both in my training bag.
- High-value treats. Small, soft and smelly is the golden rule. Think tiny cubes of cooked chicken, commercial training treats or freeze-dried liver. Pieces should be no bigger than a pea so your dog can eat them quickly and refocus.
- A treat pouch. Wearing one on your hip keeps rewards accessible without fumbling in pockets, which matters when timing is everything.
- A quiet training space. Start indoors with minimal distractions. A hallway or small room works perfectly.
You do not need expensive equipment. A basic box clicker costs less than two pounds, and you likely already have suitable treats in your kitchen. For ideas on enrichment between sessions, take a look at our roundup of safe and enriching dog toys for every stage.
Charging the Clicker: Your Very First Step
Before you can use the clicker to teach anything, your dog needs to understand that click equals treat. This initial step is called “charging” or “loading” the clicker, and it typically takes just one short session.
How to Charge the Clicker
- Sit or stand in a quiet room with your dog. Have 15 to 20 pea-sized treats ready in your pouch.
- Press the clicker once. Immediately deliver a treat to your dog’s mouth. Do not ask for any behaviour; the click is not a cue yet.
- Wait two to three seconds, then click and treat again.
- Repeat for a total of 10 to 15 repetitions.
- Test the association: wait until your dog looks away, then click. If they whip their head back toward you expectantly, the clicker is charged.

If your dog seems startled by the sound, muffle the clicker in your fist or switch to a softer button clicker. Some dogs, particularly those with a history of noise sensitivity, do better with a verbal marker like the word “yes” spoken in a short, bright tone. The principle is identical; only the signal changes.
Puppies going through their teething phase can sometimes be less food-motivated because of sore gums. In that case, try softer treats or even a quick game of tug as the reward.
First Exercises: Sit, Touch and Name Recognition
Once the clicker is charged, you are ready to teach your first behaviours. I always start clients with three foundation exercises because they build confidence in both the dog and the handler.
Exercise 1: Capturing the Sit
“Capturing” means clicking the instant your dog naturally performs a behaviour, without luring or prompting.
- Stand in front of your dog and wait. Most dogs will sit within 30 seconds simply because they are looking up at you.
- The moment your dog’s bottom touches the floor, click and toss a treat slightly to the side so they stand up to get it.
- Wait again. When they sit, click and treat.
- After five or six successful repetitions, add the verbal cue “sit” just before the dog is about to sit. Click and treat when they do.
- Practise for three to five minutes, then end the session with a jackpot (several treats at once) and some play.
Exercise 2: Hand Target (Touch)
The “touch” cue teaches your dog to press their nose to your open palm. It is incredibly useful for leash training, recall and redirecting attention away from distractions.
- Present your flat hand about 15 centimetres from your dog’s nose.
- Most dogs will investigate by sniffing. The instant their nose contacts your palm, click and treat.
- Pull your hand behind your back briefly, then present it again at a slightly different angle.
- After about eight successful repetitions, say “touch” as you present your hand.
- Gradually increase the distance your dog must move to reach your hand.
Exercise 3: Name Recognition
- Wait until your dog is looking elsewhere.
- Say their name in a cheerful voice.
- The instant they orient toward you, click and treat.
- Repeat ten times across different spots in the room.
These three exercises give your dog a toolkit of responses and, just as importantly, teach them that offering behaviour is rewarding. That mindset is the foundation of every advanced skill you will train later.
Common Mistakes and How to Avoid Them
After coaching hundreds of owners through their first clicker sessions, I see the same handful of errors again and again. Fortunately, they are all easy to fix.
- Clicking too late. If the click comes even one second after the behaviour, the dog may not connect the two. Practise your timing by clicking the instant a bouncing ball hits the floor; this sharpens your reflexes before you involve the dog.
- Forgetting to treat after the click. Every click must be followed by a reward, even if you clicked by accident. Breaking this rule weakens the clicker’s meaning.
- Sessions that are too long. Dogs, especially puppies, lose focus after about five minutes. Three short sessions a day beat one marathon round.
- Raising criteria too fast. If your dog can sit in the kitchen, that does not mean they can sit at a busy park. Increase difficulty in tiny increments: new rooms first, then the garden, then quiet outdoor areas.
- Using the clicker as a recall device. The clicker is a marker, not a cue. Clicking to get your dog’s attention teaches them to wait for the click rather than respond to verbal cues.
If you are also working on crate skills alongside clicker fundamentals, our crate training guide explains how to pair the clicker with calm crate behaviour for a smooth introduction.

Clicker Training vs Other Marker Methods
The clicker is not the only marker tool available. Below is a comparison to help you decide which approach suits your situation.
| Marker Method | Precision | Hands-Free? | Best For | Limitations |
|---|---|---|---|---|
| Box clicker | Very high | No (one hand occupied) | Initial training, shaping complex behaviours | Loud for sensitive dogs; requires carrying a device |
| Button clicker | High | No | Noise-sensitive dogs, indoor sessions | Quieter sound may be lost outdoors |
| Verbal marker (“yes”) | Moderate | Yes | Everyday reinforcement, agility, situations where hands are full | Tone varies; slightly slower neural processing than a click |
| Clicker app on phone | Moderate | No | Emergencies when you forget your clicker | Latency in sound; inconsistent volume |
| Whistle marker | High | No | Distance work, recall training outdoors | Requires practice to produce consistent sound |
In my practice, I recommend starting with a mechanical clicker for the first few weeks to build the strongest possible association, then transitioning to a verbal marker for everyday life. The Blue Cross guide on clicker training echoes this advice, noting that the clarity of a mechanical click makes early learning faster and more reliable.
Advancing Your Clicker Skills: Shaping and Chaining
Once you and your dog are comfortable with capturing and luring, the next level involves two powerful techniques: shaping and chaining.
Shaping
Shaping means reinforcing successive approximations toward a goal behaviour. Imagine you want your dog to close a cupboard door with their nose. You would:
- Click and treat for looking at the cupboard door.
- Click and treat for moving toward the door.
- Click and treat for touching the door with their nose.
- Click and treat only when the touch is hard enough to move the door.
- Finally, click and treat when the door clicks shut.
Shaping encourages creative problem-solving and builds a dog who actively experiments. It is one of the most rewarding aspects of clicker training, both for the trainer and the dog. According to the American Kennel Club’s guide on clicker training, shaping is particularly effective for teaching complex tricks and service-dog tasks because it breaks large behaviours into manageable increments.
Chaining
Chaining links several individually trained behaviours into a sequence. For example, a dog who knows “sit,” “down” and “roll over” separately can learn to perform all three in order with a single cue. You build the chain from the last behaviour backward (called back-chaining), which keeps the dog motivated because each step leads closer to the final reward.
Dogs who have been adopted from shelters often take to shaping with surprising enthusiasm. If you are working with a rescue dog, our dog adoption guide has tips on helping new arrivals settle in before you begin structured training.
When and How to Fade the Clicker
A question I hear almost every week is: “Will I have to carry this clicker forever?” The answer is no. The clicker is a teaching tool, not a lifelong requirement. Here is the general process for fading it out:
- Behaviour is fluent. Your dog responds correctly at least 8 out of 10 times in various environments.
- Switch to a verbal marker. Replace the click with a consistent word like “yes” or “good.” Continue treating after the marker.
- Move to a variable reinforcement schedule. Instead of treating every correct response, reward every second or third one, then randomise. This actually strengthens the behaviour because it mimics the unpredictability of a slot machine, keeping the dog engaged.
- Replace food with life rewards. A door opening for a walk, permission to greet a friend, or a thrown ball can all serve as reinforcement once the behaviour is reliable.
I typically keep the clicker in rotation for teaching new behaviours while using verbal markers for skills the dog already knows well. Think of it like stabilisers on a bicycle: essential at first, then gradually removed as balance improves.
For dogs who struggle with reactivity during outdoor sessions, our article on understanding and managing aggression triggers offers a complementary framework for keeping sessions safe and productive. And if excessive vocalisation is disrupting your training flow, the strategies in our guide on causes of excessive barking and how to fix it can help you build calmer sessions.
Sample Weekly Clicker Training Plan for Beginners
| Day | Session Length | Focus | Goal |
|---|---|---|---|
| Monday | 3 minutes × 2 | Charge the clicker | Dog orients to you on hearing click |
| Tuesday | 3 minutes × 2 | Capture the sit | Dog sits 5 times without lure |
| Wednesday | 4 minutes × 2 | Hand target (touch) | Dog touches palm 8 out of 10 tries |
| Thursday | 4 minutes × 2 | Name recognition | Dog looks at you when name is called from 2 metres |
| Friday | 5 minutes × 2 | Mix sit + touch + name | Dog responds to each cue in random order |
| Saturday | 5 minutes × 2 | Add new location (garden) | Dog performs sit and touch outdoors |
| Sunday | Free play | Rest and enrichment | Let the learning consolidate |
This plan gives you a structured starting point, but feel free to adjust based on your dog’s energy and progress. Puppies under 16 weeks may need even shorter sessions of two minutes each, while adult dogs with strong food drive can handle slightly longer rounds.
Key Points
- Charge your clicker with 10 to 15 click-treat pairings before asking for any behaviour
- Keep sessions to 3 to 5 minutes and aim for two to three sessions per day rather than one long one
- Start with capturing the sit, hand target and name recognition as your three foundation exercises
- Always click at the exact moment the behaviour happens, then deliver the treat within one to two seconds
- Fade the clicker gradually by switching to a verbal marker and variable reinforcement once behaviours are fluent
Frequently Asked Questions
What is the clicker training method?
Clicker training is a positive-reinforcement method that uses a small device to produce a consistent “click” sound the moment your dog performs a desired behaviour. The click acts as a bridge signal between the behaviour and a food reward, telling the dog precisely what they did right. It is based on operant conditioning and avoids any form of punishment or physical correction.
Yes. Multiple studies in animal behaviour science have demonstrated that marker-based training, including clicker training, accelerates learning and improves retention compared to training without a marker signal. In my own practice, dogs consistently learn new cues in fewer repetitions when I use a clicker versus voice alone. The method is used by professional trainers, veterinary behaviourists and organisations such as the PDSA for dogs of all breeds, ages and temperaments.Do dog training clickers really work?
The main challenges are timing and coordination. Holding a clicker, treats and sometimes a lead can feel awkward at first. Some noise-sensitive dogs find the click startling, though switching to a softer clicker or a verbal marker solves this. Additionally, clicker training requires consistency; if multiple family members train the dog, everyone must follow the same rules. None of these are deal-breakers, and most owners overcome them within the first week of practice.What are the disadvantages of clicker training?
Absolutely. I have successfully clicker trained dogs aged ten and older. Older dogs may take a few extra repetitions to form the click-treat association, but once they grasp the concept, they learn new behaviours with the same enthusiasm as younger dogs. Clicker training is also excellent for senior dogs recovering from anxiety or adjusting to a new home after adoption.Can you clicker train an older dog?
Most dogs understand that the click predicts a treat within a single three-minute session. Simple behaviours like sit and touch are usually reliable in the training environment within three to five days of consistent practice. Proofing those behaviours in distracting real-world settings takes longer, typically two to four weeks of gradual generalisation. Complex tricks or behaviour-modification programmes may take several months, but you will notice incremental progress from the very first session.How long does it take to see results with clicker training?
Yes. A short, distinct word like “yes” or “yep” can serve as a verbal marker. The key is to keep the word consistent in tone and length and always follow it with a reward. Many trainers, myself included, start with a mechanical clicker for precision during the teaching phase, then transition to a verbal marker for everyday use once the behaviour is fluent.Can I use a word instead of a clicker?