

Key Takeaways
- Knowing basic dog first aid can stabilise your pet in the critical minutes before you reach a vet
- A well-stocked canine first aid kit should contain at least 15 essential items, including gauze, saline solution and a digital thermometer
- Dogs suffering heatstroke can reach a core temperature above 41°C within minutes; cooling must begin immediately
- Canine CPR combines 30 chest compressions with 2 rescue breaths per cycle, at a rate of 100–120 compressions per minute
- The RSPCA advises that any dog showing signs of poisoning should be seen by a vet within 30 minutes for the best chance of recovery
- Knowing the difference between a “wait and watch” wound and a true veterinary emergency can save your dog’s life and spare unnecessary stress
In This Guide
In my ten-plus years as a Certified Professional Dog Trainer, I have seen first-hand how a calm, prepared owner can make the difference between a full recovery and a tragic outcome. Dog first aid is not a substitute for veterinary care; it is the bridge that keeps your dog stable until professional help arrives. Whether you are dealing with a minor scrape after a hike or a sudden choking episode at dinner time, having the right knowledge and supplies on hand is non-negotiable.
I wrote this guide because too many owners tell me they would not know where to start if their dog collapsed or swallowed something toxic. By the end of this article, you will understand how to assess an emergency, perform life-saving techniques and build a kit that covers the most common canine mishaps. Let’s get into it.
Why Every Dog Owner Needs First Aid Skills
Dogs are curious by nature. They explore the world nose-first, chew things they should not and occasionally find themselves in situations that require immediate intervention. According to the PDSA’s pet first aid guidance, around one in three pet owners will face an emergency situation with their animal at some point. Yet most owners have never practised a single first aid technique on a dog.
The golden window in most canine emergencies is the first 5 to 10 minutes. During that time, actions like controlling severe bleeding, clearing an airway or beginning to cool a dog with heatstroke can directly influence survival rates. Veterinary clinics are rarely next door, and even a short car journey can feel like an eternity when your dog is in distress.
Learning dog first aid also changes your confidence level during everyday activities. I notice that owners who have completed a basic course are calmer on walks, more willing to try new environments (which is great for travelling with your dog) and quicker to spot early warning signs of illness. Knowledge reduces panic, and a calm owner means a calmer dog.
Building Your Dog First Aid Kit
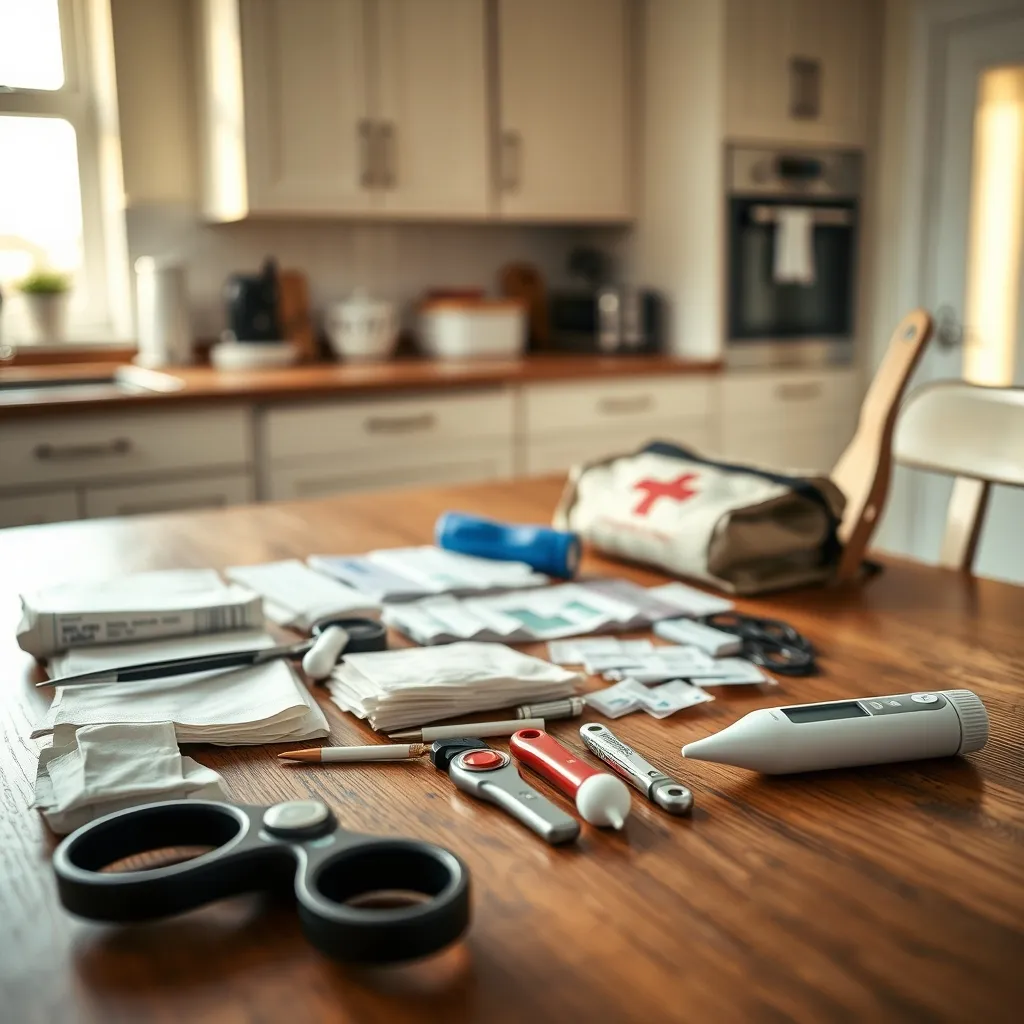
A dedicated dog first aid kit is the foundation of preparedness. I keep one at home and a smaller version in my car; if you travel frequently with your pet, I recommend you do the same. You can buy pre-made kits, but assembling your own ensures you know every item inside and can customise it for your dog’s specific needs.
| Item | Purpose | Notes |
|---|---|---|
| Sterile gauze pads (various sizes) | Wound dressing, pressure application | Non-stick varieties are best for open wounds |
| Self-adhesive bandage (e.g., Vetrap) | Securing dressings, light support | Do not wrap too tightly; check circulation every 10 min |
| Blunt-ended scissors | Cutting bandages, trimming fur around wounds | Curved tips help avoid nicking skin |
| Sterile saline solution | Flushing wounds and eyes | Pre-filled pods are convenient for travel kits |
| Digital thermometer | Checking for fever or hypothermia | Normal canine range: 38.3–39.2°C |
| Disposable gloves (latex-free) | Hygiene and self-protection | Pack at least 4 pairs |
| Tweezers (fine-tipped) | Removing ticks, splinters or debris | A tick-removal tool is even better for ticks |
| Styptic powder or cornstarch | Stopping minor nail bleeding | Essential if you trim nails at home; see our nail first aid kit guide |
| Hydrogen peroxide (3%) | Inducing vomiting only under vet instruction | Never administer without speaking to a vet first |
| Emergency blanket (foil type) | Warmth for shock, carrying injured dog | Lightweight and folds very small |
| Muzzle or soft fabric strip | Preventing bites from a panicked dog | Even the friendliest dog may bite when in pain |
| Oral syringe (no needle) | Administering fluids or medications | 10 ml size works well for most breeds |
| Antiseptic wipes (pet-safe) | Cleaning around wounds | Avoid alcohol-based wipes on open cuts |
| Contact card | Vet’s number, poison helpline, insurance details | Laminate it so it survives spills |
| LED torch | Examining mouth, ears or wounds in low light | A small penlight works perfectly |
Store the kit in a clearly labelled, waterproof container. Check it every three months to replace expired items or restock anything you have used. If you are putting together a travel kit, pair it with the essentials from our dog travel checklist so nothing gets left behind.
How to Handle Bleeding and Wounds

Cuts, scrapes and puncture wounds are among the most common injuries I see owners dealing with. The approach depends on severity, but the basic principle is always the same: control the bleeding first, then clean the wound.
Minor Wounds
For shallow scrapes or small cuts, gently flush the area with sterile saline to remove dirt and debris. Pat dry with clean gauze and apply a light, non-stick dressing if the wound is in a spot your dog will lick. A loose self-adhesive bandage can hold the dressing in place. Monitor the wound daily for redness, swelling or discharge, which may indicate infection.
Severe Bleeding
If blood is spurting or flowing steadily, apply firm, direct pressure with a thick pad of gauze or a clean cloth. Hold the pressure for at least 5 minutes without lifting the pad to check. If blood soaks through, add another layer on top rather than removing the first one. Once bleeding slows, bandage the area firmly (but not so tight that you cut off circulation) and head to the vet immediately.
Puncture wounds from bites or sharp objects are deceptive. They may look small on the surface while causing significant damage underneath. Always have puncture wounds assessed by a vet, even if bleeding stops quickly. Dogs who have been in altercations, particularly breeds prone to reactivity, need a thorough check for hidden injuries. Our article on why dogs bark covers early warning signs that can help you avoid confrontations in the first place.
What to Do If Your Dog Is Choking
Choking is one of the most frightening emergencies because it happens fast. Common culprits include sticks, balls that are too small, chunks of rawhide and food that has not been chewed properly. Recognising the signs is your first step.
Signs of choking:
- Pawing at the mouth
- Gagging or retching without producing anything
- Excessive drooling
- Blue-tinged gums or tongue
- Panic, distress or loss of consciousness
Immediate Steps
- Stay calm and restrain your dog gently. A panicking dog may bite. If possible, have someone help you.
- Open the mouth carefully. Use both hands to pull the upper and lower jaws apart. If you can see the object and it is not deeply lodged, try to remove it with your fingers or blunt tweezers. Never push the object further in.
- If you cannot see or reach the object, try a modified Heimlich manoeuvre. For small dogs, hold the dog with its back against your chest, place a fist just below the ribcage and give 5 quick upward thrusts. For larger dogs, stand behind them while they are on all fours, place your fist below the ribcage and thrust upward and forward. The Blue Cross emergency guide for dogs provides helpful illustrations of this technique.
- Check the mouth again after each set of thrusts. If the object dislodges, remove it immediately.
- If your dog loses consciousness, begin CPR (detailed below) and get to a vet as fast as possible.
Prevention matters here. Choose toys and chews that are appropriate for your dog’s size, and supervise play sessions, especially with new items. If your dog spends time in a crate, only leave safe, size-appropriate toys inside; our guide to toys for crate training can help you pick the right ones.
Recognising and Responding to Heatstroke
Heatstroke kills dogs every year, and it can develop in as little as 15 minutes in hot conditions. Brachycephalic breeds (think Bulldogs, Pugs and Shih Tzus), overweight dogs and senior dogs are at highest risk, but any dog can overheat.
Warning signs include:
- Heavy, rapid panting that does not ease when resting
- Thick, sticky saliva
- Bright red tongue and gums
- Vomiting or diarrhoea
- Wobbling, staggering or collapse
- Confusion or unresponsiveness
Cooling Protocol
- Move the dog to a shaded or air-conditioned area immediately.
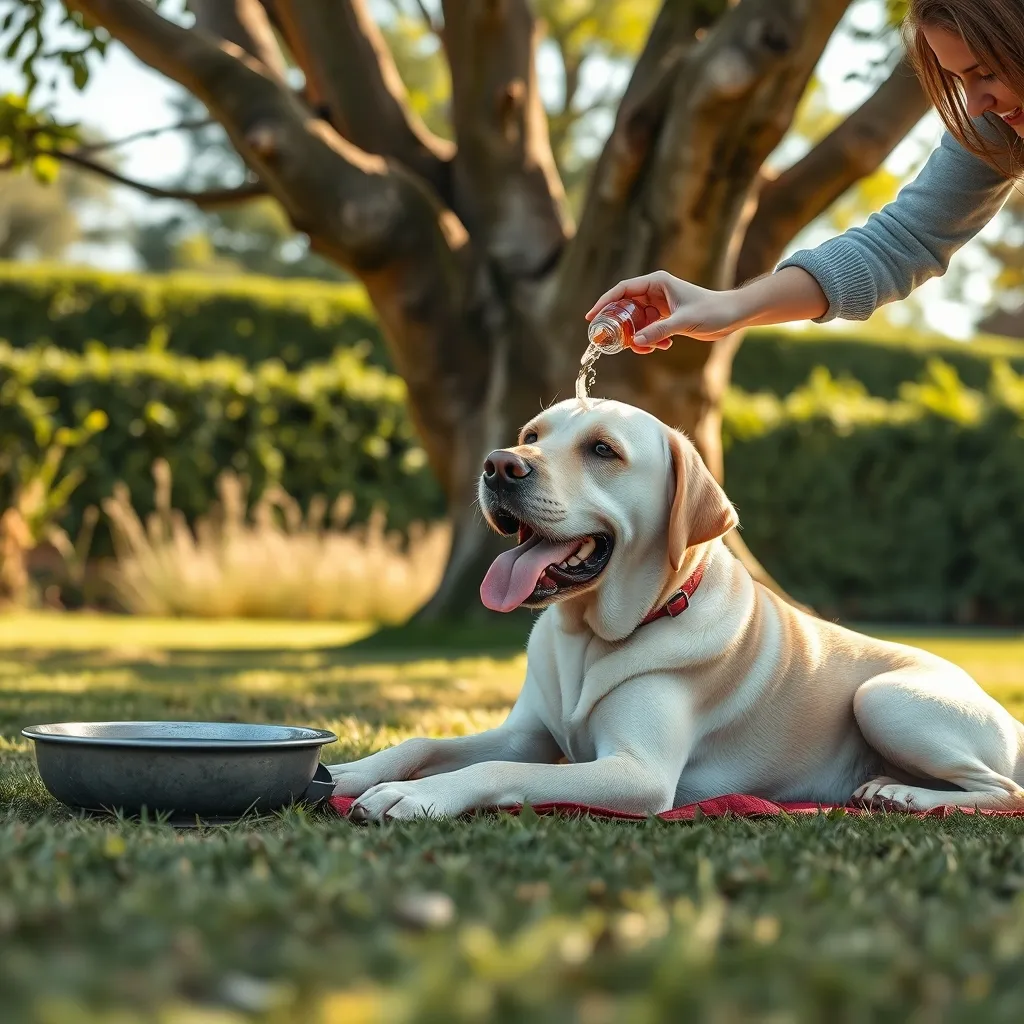
- Begin active cooling. Pour cool (not ice-cold) water over the dog’s body, focusing on the neck, armpits and groin where large blood vessels sit close to the surface. Alternatively, drape cool, wet towels over these areas and replace them every 2 minutes as they warm up.
- Offer small amounts of cool water to drink, but do not force it.
- Use a fan or create airflow to aid evaporative cooling.
- Stop active cooling once the rectal temperature drops to 39.4°C. Overcooling can cause hypothermia and shock.
- Transport to a vet even if the dog appears to recover. Internal organ damage from heatstroke can be delayed.
A critical point: never use ice or ice-cold water. This causes blood vessels at the skin surface to constrict, trapping heat inside the body and making the situation worse. The RSPCA’s dog first aid advice stresses this point and recommends room-temperature to cool water as the safest option.
CPR for Dogs: A Step-by-Step Guide
Cardiopulmonary resuscitation (CPR) for dogs follows the same ABC logic as human CPR: Airway, Breathing, Circulation. I truly hope you never need this, but knowing it could save your dog’s life. The success rate for canine CPR is modest (studies suggest around 6% overall survival to discharge), but those odds are infinitely better than doing nothing.
When to Perform CPR
Only begin CPR if your dog is unconscious, not breathing and has no detectable heartbeat. Check for breathing by watching the chest for movement and feeling for air from the nostrils. Check for a pulse by pressing your fingers against the inside of the upper hind leg (the femoral artery).
The Technique
- Position your dog on their right side on a firm, flat surface.
- Clear the airway. Extend the head and neck, pull the tongue forward and check for any visible obstructions.
- Give 2 rescue breaths. Close the mouth, seal your lips around the nostrils and blow gently until you see the chest rise. For small dogs, cover both the nose and mouth with your mouth.
- Begin chest compressions. Place both hands (one on top of the other) over the widest part of the ribcage for medium to large dogs. For small dogs, use one hand or wrap your hand around the chest. Compress to one-third to one-half of the chest width.
- Perform 30 compressions at a rate of 100–120 per minute, then give 2 rescue breaths. This is one cycle.
- Continue cycles for 2 minutes, then check for a pulse and breathing. Resume if there are no signs of life.
- Do not stop until the dog begins breathing on its own, you reach a vet or you are physically unable to continue.
Practising on a canine CPR dummy (available at many dog first aid courses) builds muscle memory so you can act without hesitation in a real emergency.
Poisoning: Identifying Signs and Taking Action
Dogs can be poisoned by an alarming range of household items: chocolate, grapes, xylitol (found in sugar-free gum), antifreeze, certain plants, rodent bait and human medications, to name just a few. The signs vary depending on the substance, but common indicators include:
- Vomiting or diarrhoea (sometimes with blood)
- Excessive drooling or foaming at the mouth
- Tremors, seizures or muscle twitching
- Lethargy, weakness or collapse
- Pale or yellowish gums
- Rapid or irregular heartbeat
What to Do
- Identify the substance if possible. Keep the packaging, take a photo or collect a sample of what your dog ingested. This information is critical for your vet.
- Call your vet or an emergency poison helpline immediately. In the US, the ASPCA Animal Poison Control Centre can be reached at (888) 426-4435 (a consultation fee applies). In the UK, the Blue Cross and the Animal PoisonLine (01202 509000) are valuable resources.
- Do not induce vomiting unless a vet tells you to. Some substances (like caustic chemicals or sharp objects) cause more damage on the way back up.
- Do not give milk, salt water or home remedies. These can worsen the situation.
- Keep your dog calm and quiet while you arrange transport to the vet.
Prevention is your best defence. Keep medications locked away, store cleaning products out of reach and be aware of which garden plants are toxic. Ensuring your dog has a solid vaccination schedule is important, but protecting them from household toxins is equally vital for their day-to-day safety.
When to Rush to the Emergency Vet
Not every injury or illness requires an emergency visit, but certain situations demand immediate veterinary attention. Knowing the difference prevents dangerous delays on the one hand and unnecessary panic on the other.
Go to the emergency vet immediately if your dog:
- Is unconscious or unresponsive
- Has difficulty breathing or is choking and you cannot clear the obstruction
- Is bleeding heavily and you cannot control it with direct pressure
- Has suspected broken bones (visible deformity, inability to bear weight, severe swelling)
- Shows signs of bloat (distended abdomen, retching without producing vomit, restlessness); this is a life-threatening emergency
- Has had a seizure lasting more than 3 minutes or multiple seizures in a row
- Has been hit by a vehicle, even if they appear fine afterward
- Has ingested a known toxin
- Has a rectal temperature above 41°C or below 37°C
- Displays sudden paralysis in the hind legs
When transporting an injured dog, minimise movement. If possible, slide the dog onto a flat board or stiff blanket to act as a stretcher. Keep the car warm and drive as smoothly as you can. Having a helper in the back to monitor the dog is ideal. Dogs who are fearful during car journeys may benefit from the crate-training techniques we cover in our crate training guide, which can also make emergency transport safer and less stressful for everyone.
I also encourage every owner to know the location and contact details of their nearest 24-hour emergency veterinary clinic before an emergency arises. Programme it into your phone right now; you do not want to be searching for it at 2 a.m. with a sick dog in your arms.
Finally, consider taking a formal dog first aid course. Hands-on practice with techniques like CPR, bandaging and the Heimlich manoeuvre is invaluable. Many organisations, including the RSPCA, offer accredited courses that you can complete in a single day. It is a small investment of time that could pay off enormously.
Key Points
- Assemble a dedicated dog first aid kit with at least 15 items and check it every three months
- For severe bleeding, apply firm direct pressure for a minimum of 5 minutes without lifting the gauze
- Cool a dog with heatstroke using cool (not ice-cold) water and stop active cooling once the temperature reaches 39.4°C
- Perform canine CPR at 30 compressions to 2 breaths at 100–120 compressions per minute
- Never induce vomiting in a poisoning case without direct instruction from a vet
Frequently Asked Questions
What is the 7 7 7 rule for dogs?
The 7 7 7 rule is a socialisation guideline suggesting that by 7 weeks of age, a puppy should have been on 7 different surfaces, played with 7 different toys and met 7 different people. It is designed to build confidence during the critical early development window. While not directly a first aid concept, well-socialised dogs tend to be calmer during emergencies, making first aid easier to administer.
What first aid can I use on my dog at home?
At home, you can safely clean minor wounds with sterile saline, apply pressure to stop bleeding, remove visible ticks with a tick tool and begin cooling a dog showing signs of heatstroke. You should also know how to perform the canine Heimlich manoeuvre and CPR. However, home first aid is a temporary measure; always follow up with a vet for anything beyond a superficial scrape.
How do I know if my dog needs emergency veterinary care?
Seek emergency care if your dog is unconscious, struggling to breathe, bleeding uncontrollably, having prolonged seizures, showing signs of bloat (distended stomach, non-productive retching) or has ingested a known toxin. A rectal temperature above 41°C or below 37°C also warrants an immediate vet visit. When in doubt, call your vet for telephone triage.
Can I give my dog human painkillers in an emergency?
No. Human painkillers such as ibuprofen, paracetamol and aspirin can be extremely toxic to dogs, potentially causing kidney failure, liver damage or gastric ulceration. Never administer any human medication without explicit veterinary guidance. If your dog is in pain, keep them calm and comfortable and get to a vet as quickly as possible.
How often should I replace items in my dog first aid kit?
Check your kit every three months. Replace any items that have been used, opened or have passed their expiry date. Pay particular attention to saline solution, hydrogen peroxide and antiseptic wipes, as these degrade over time. It is also worth reviewing the contact card to ensure phone numbers and insurance details are still current.
Is it worth taking a dog first aid course?
Absolutely. A hands-on course gives you the chance to practise CPR, bandaging, the Heimlich manoeuvre and other techniques under expert supervision. Organisations such as the RSPCA and Blue Cross offer accredited one-day courses that cover the most common canine emergencies. The confidence you gain is well worth the investment.